
QuickBooks Forms Customization
How to Customize Form Templates in QuickBooks
Step 1. Go to the List menu, and select Templates.
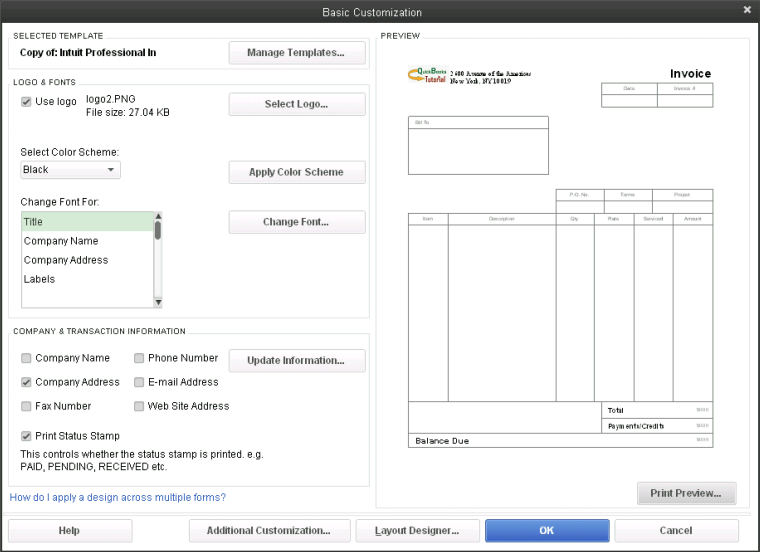
Step 2. From the list of forms in the new "Template" window, double click on the form you want to customize. You will then be taken to the Basic Customization window as shown in the snapshot below. The preview will be there to the right of the page as a guide so you can see the changes as you make them:

Step 3. Check the box next to Use Logo, and select your logo from your local file (hard or flash drive) and click Open. QuickBooks will open it in your form template, and you will get to customize it later.
Step 4. Click Additional Customization at bottom of page. You will be taken to a screen as shown in the screenshot below:
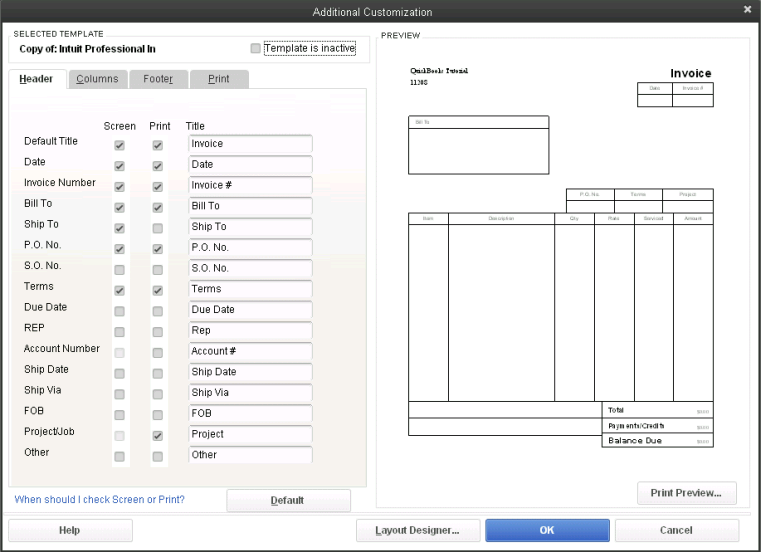
Next, click on Header and check the boxes for the options you want added to the form, then Columns and check the required boxes, then Footer. (There are two options for each tab (screen and print). Screen options chosen will be displayed only on screen, and print options chosen will be printed on forms.)
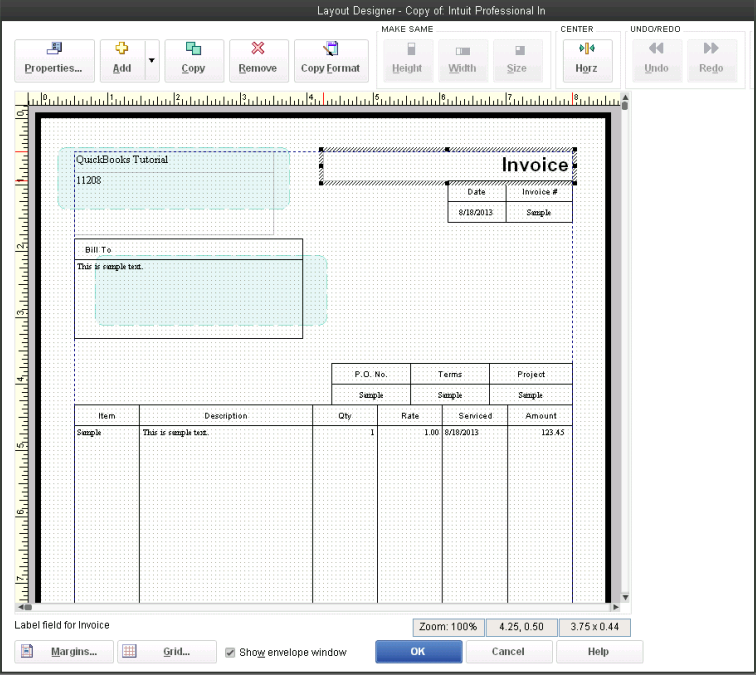
Step 5. Next, click on Layout Designer to line up the rows and columns the way you want them. You will be taken to the screen as shown in the screenshot below. Click on each field you want to align, and drag it to where you want it. You can also click on individual lines, and drag it to widen or narrow each row or column.
Step 6. Now, change the font of the form by clicking on Change Font and choosing the font type, color, and size you require. If you would like to change the color of the borders on your template, click on the drop-down icon at Select Color Scheme and select your color, then click Apply Color Scheme. Click Ok when you are pleased with your form template. See my completed customized form template in the screenshot below:
How to Apply a Form Template Design to Multiple Templates
After you have saved a design, you can apply it to several templates at once:
Step 1. Go to Customers, and select Create Invoices.
Step 2. Click the Formatting tab, then the "Customize Design" drop-down arrow and select Customize Design
Step 3. Click the My Saved Designs link near the top of the window.
Step 4. Right Next to the design you want to use, click Re-apply to Forms.
Step 5. Select the form templates. (The standard view of the Apply Design window is your default templates. If you want to apply your design to more templates, click Show All Templates.)
Step 6. After selecting the templates, click Apply. You can now use the same template for the forms you saved it to. (If you had a previous design, saving the changes for the new design will not overwrite the previous one. When QuickBooks applies your design changes to any of your form templates, it makes a copy of the original and applies the changes to the copies.
How to Edit, Copy, or Delete a Form Template
Step 1. Go to the List menu, and select Templates.
Step 2. From the list of forms in the new "Template" window, double click on the form you want to edit, copy, or delete. You will then be taken to the Basic Customization window.
Step 3. Click on Manage Templates.
Step 4. In the new "Manage Templates" window, click on Copy to make a copy of the form template. (You can rename the template copy QuickBooks makes in the upper right of form). Click on Delete to delete form template.
Step 5. Answer Ok to the question, "Are you sure you want to delete this template?"
To Edit:
Step 1. Follow steps 1 and 2 above.
.png)