
QuickBooks 1099 Vendor Setup
- Setting Up 1099 Vendors in QuickBooks for Windows (Pro, Premier)
- Setting Up 1099 Vendors in QuickBooks Online
Setting Up 1099 Vendors in QuickBooks for Mac
First: Create the Vendor Account and Check Mark the "Vendor Eligible for 1099" box.
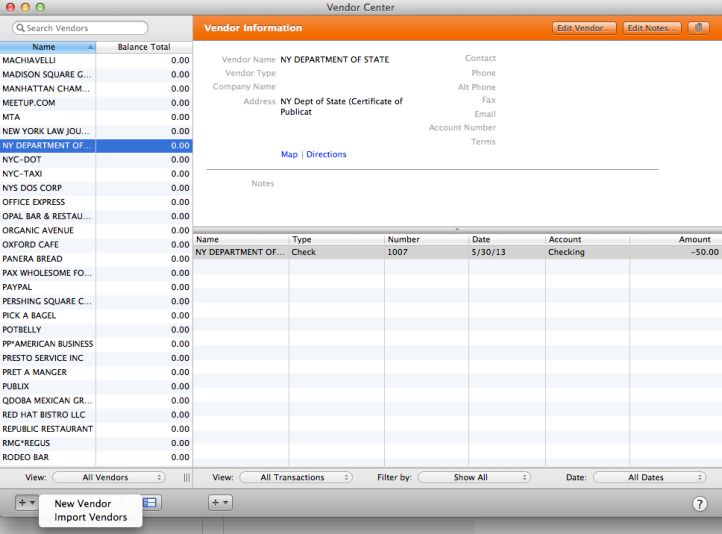
Step 1. In menu bar, click Vendor then Vendor Center
Step 2. At bottom left of screen, click on the + sign, and select New Vendor as shown on the screenshot below.
Step 3. In new screen at Address Info, enter Vendor's name, address, and contact info.

Step 4. Next, click on Additional Info and enter the vendor's tax ID number at the Tax ID: box, and check mark the box Vendor eligible for 1099
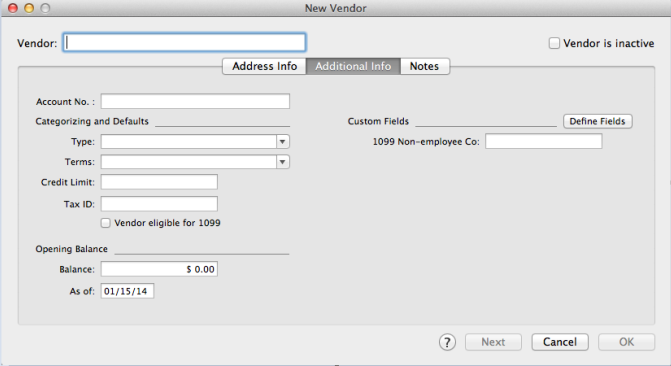
Step 5. Click OK at bottom right.
Then: Setup the Preferences for 1099 Allocation.
Step 1. Click on QuickBooks in menu bar, and select Preferences
Step 2. In new screen, click on 1099s
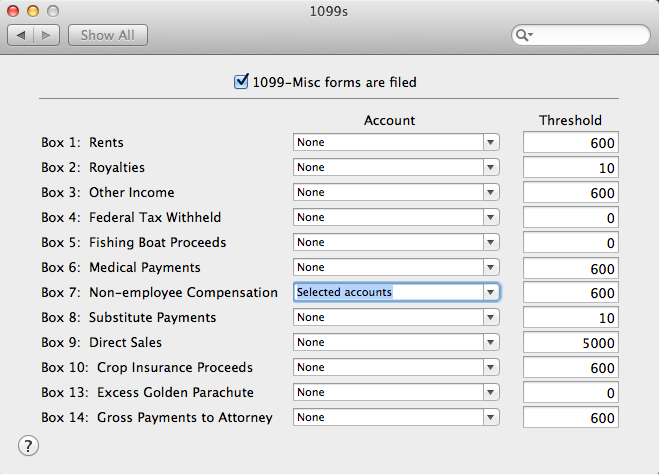
Step 3. Click on the drop-down button for each account you will be preparing 1099's for, and select the account from the "Chart of Accounts" that will be associated with the vendor. (The most commonly used is the "Non-employee Compensation").
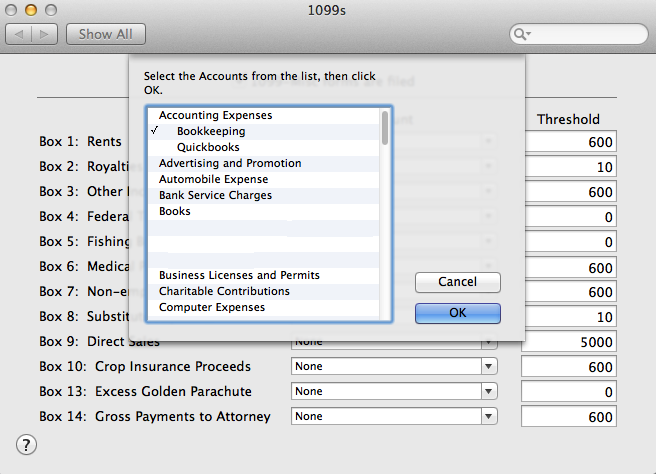
***To associate more than one "Chart of Account" to an account in the 1099 window, click the drop-down box at the account and click on Selected accounts, then click on each account that your 1099 vendors will be associated with. For example: to associate more than one vendors to "Non-employee Compensation" click the drop-down at Non-employee Compensation and click on Selected accounts. In the new pop-up window click on all the accounts that your vendors billed you for.
Step 4. Click Ok.
.png)